What is Indo-Nepal Money Transfer?
Indo-Nepal is a cross-border remittance service that allows agents in India to send money to beneficiaries in Nepal securely and conveniently. The service ensures safe transactions, quick processing, and compliance with regulatory requirements.
How to Register Yourself for Indo-Nepal Money Transfer?
To start using the Indo-Nepal Money Transfer service for your customers, you must first complete your registration and KYC (Know Your Customer) process.
Step 1: Open Indo-Nepal from the left-menu
Step 2: Update Your Profile
If any of your profile details which are required for Indo-Nepal are missing, the system will show the relevant profile update screen.
Your details which you have already provided will be auto-filled.
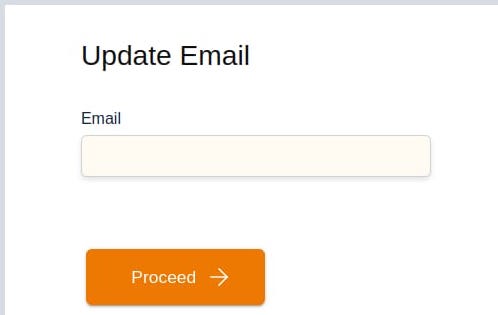
2.a. Update Email
- Enter your Email ID and click Proceed to continue to the next step.
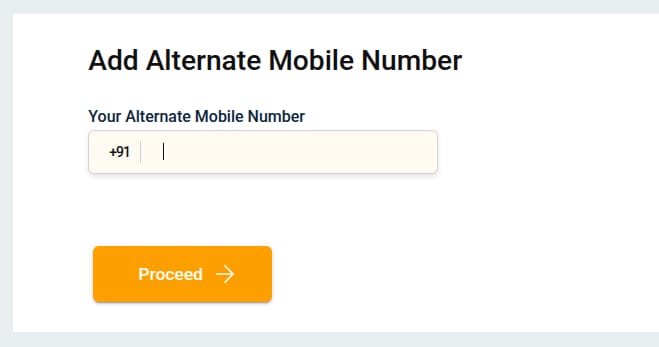
2.b. Update Alternate Number
- Enter your Alternate Mobile Number and click Proceed to continue to the next step. At this point, an OTP will be sent to this number.
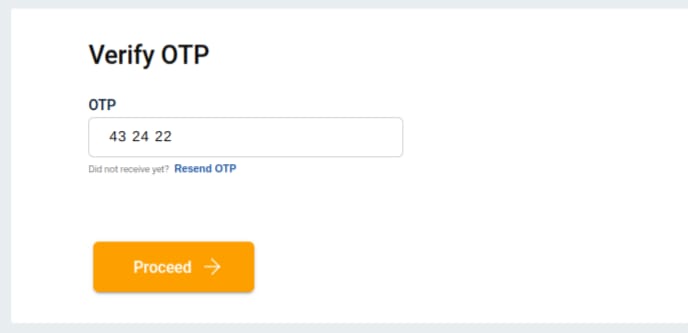
- Enter the OTP sent to your Alternate Mobile Number, click Proceed to continue to the next step.
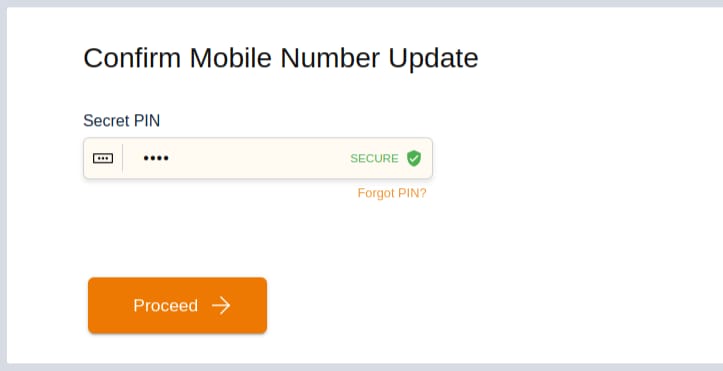
- Enter your Secret PIN and proceed.
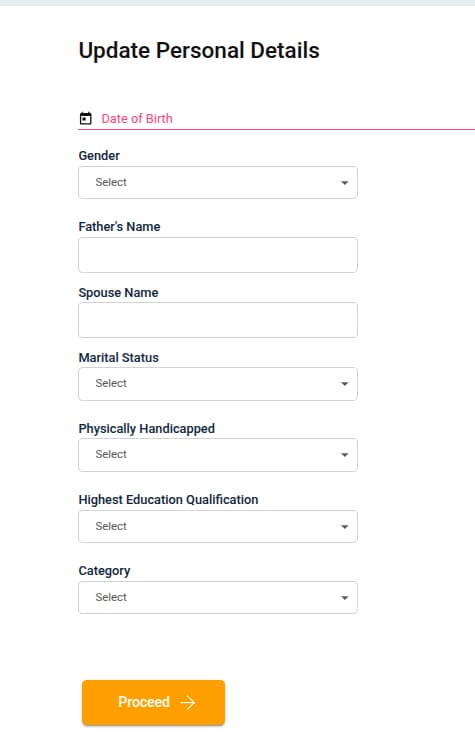
2.c. Personal Details
Please provide the following of your personal details, if they are empty:
- Your Date of Birth (as per your valid Identity Proof)
- Gender
- Father’s Name
- Marital Status (Single/Married)
- Physically Handicapped (Yes/No)
- Education Qualification (Graduate/Post-Graduate/etc.)
- Category (General/OBC/SC/ST/etc.)
After filling in your details, click Proceed to continue to the next step.
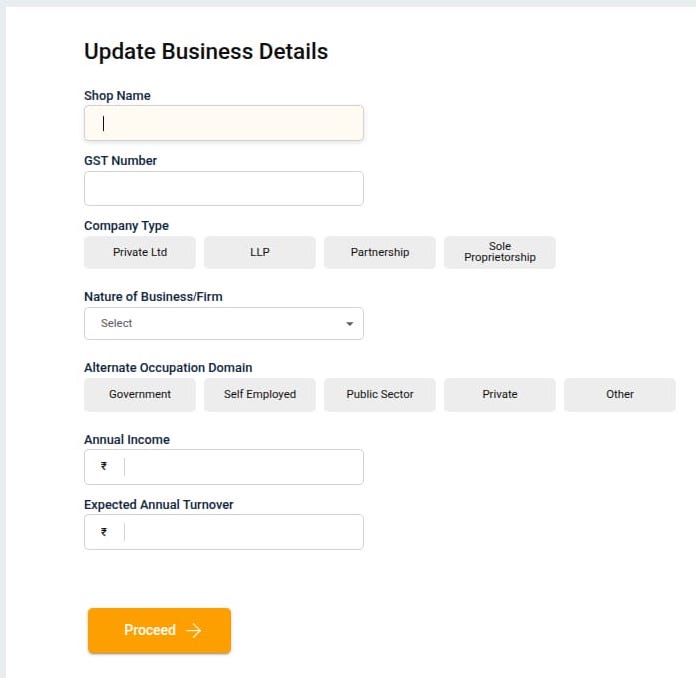
2.d. Business Details
Please provide the following of your shop/business details, if they are empty:
- Shop Name
- GST Number
- Company Type (Private Ltd / LLP / Proprietorship / etc.)
- Nature of Business (select the type of your shop or business)
- Alternate Occupation Domain (Govt / Private / Self Employed / etc.)
- Annual Income
- Expected Annual Turnover
After filling details, click Proceed to continue to the next step.
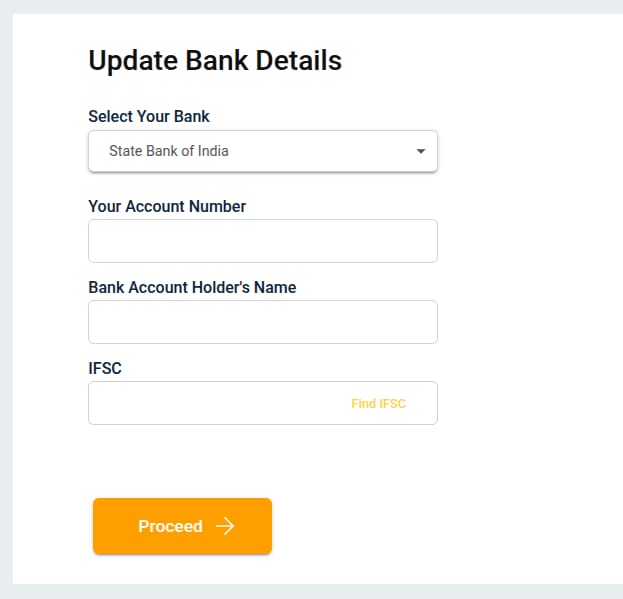
2.e. Bank Details
Enter the details of your own bank account:
- Select Your Bank
- Enter Your Bank Account Number
- Enter Your Name (as per your bank account records)
- Enter IFSC Code (of your bank branch)
After filling details, click Proceed to continue to the next step.
Step 3: Verify OTP
- An OTP will be sent to your registered mobile number.
- Enter OTP to complete verification.
- Click Proceed to continue to the next step.
Step 4: Initiate RBL KYC
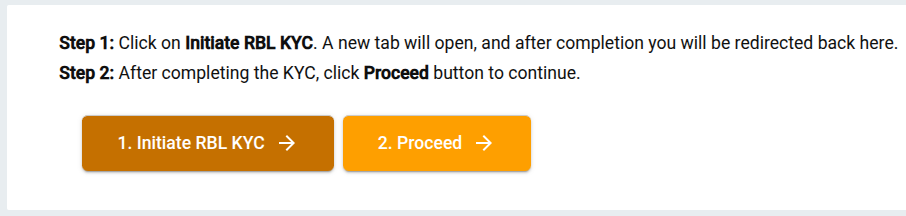
- Click Initiate RBL KYC on the screen to complete the KYC process. It will open the “Aadhaar-based KYC” page.
- Enter your Aadhaar Number/VID (twice)
- Enter your Date of Birth & Gender
- Accept terms & conditions
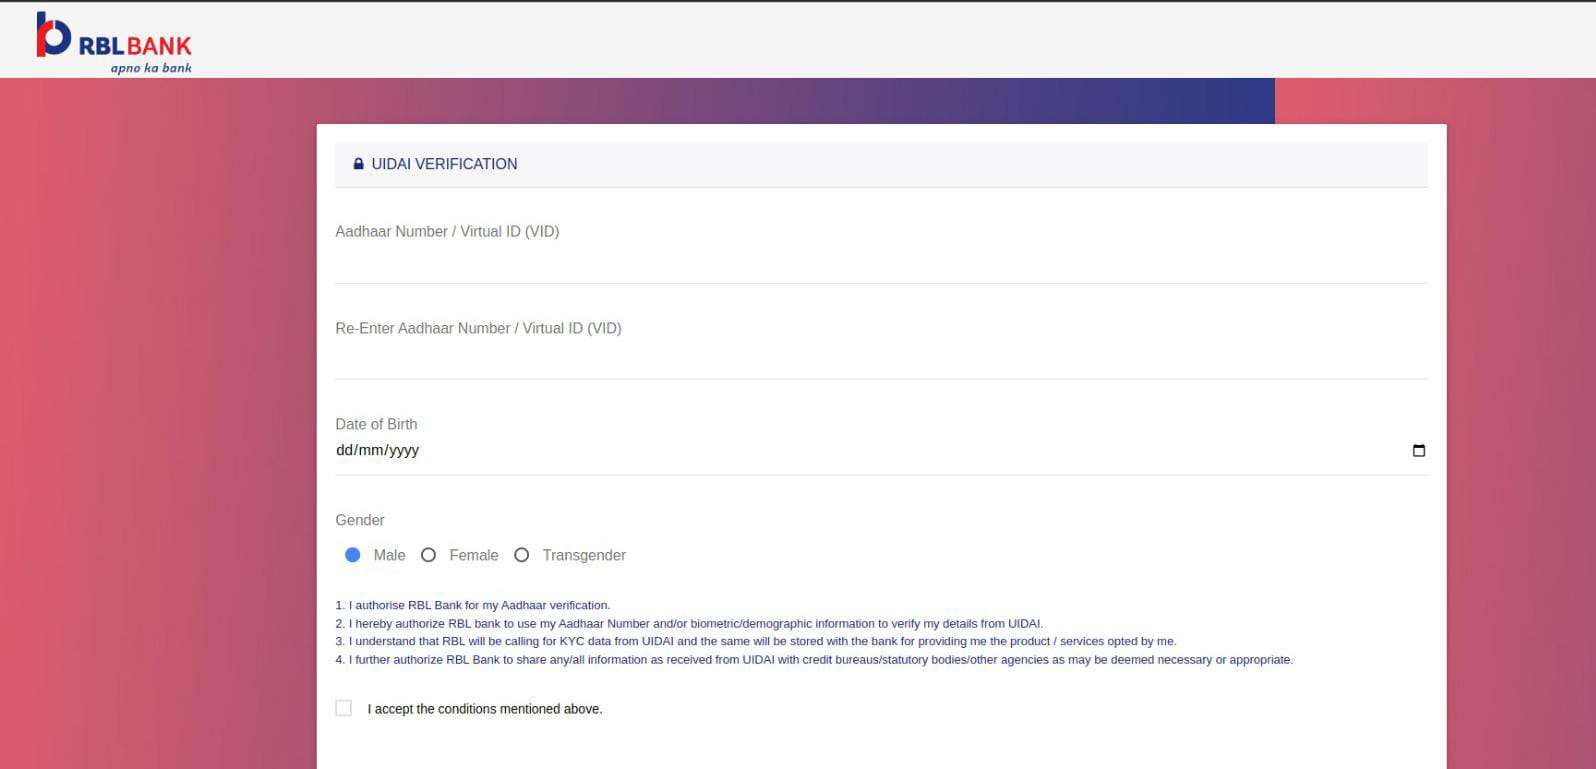
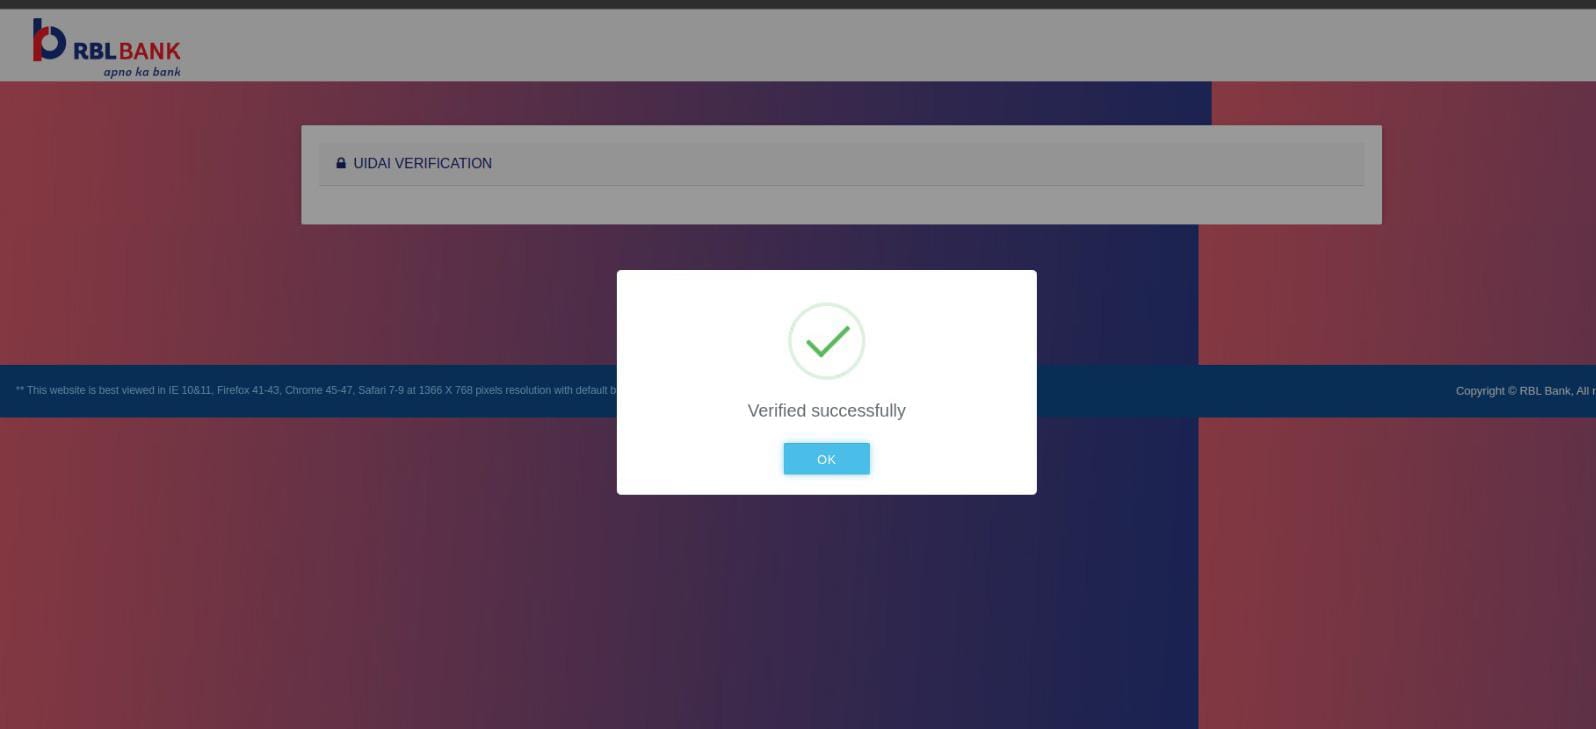
- Click Submit → then OK
- After completing the KYC, click Procced button to continue.
Step 5: Biometric Authentication
-
Scan your fingerprint using a supported device.
-
Click on the Proceed button to continue to the onboarding step.

- If your onboarding fails due to any reason, our support team will be notified automatically, and they will try to resolve the issue by contacting the bank.
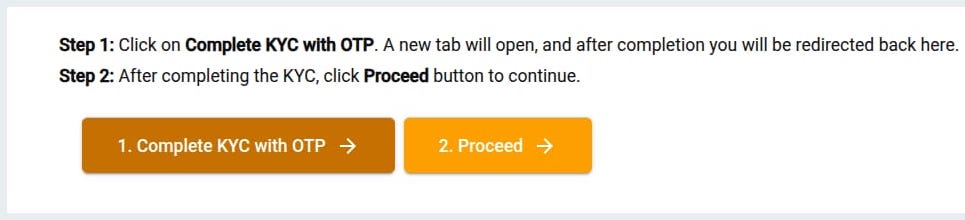
- If onboarding is successful, the following card will be displayed.
- Click on Complete KYC with OTP
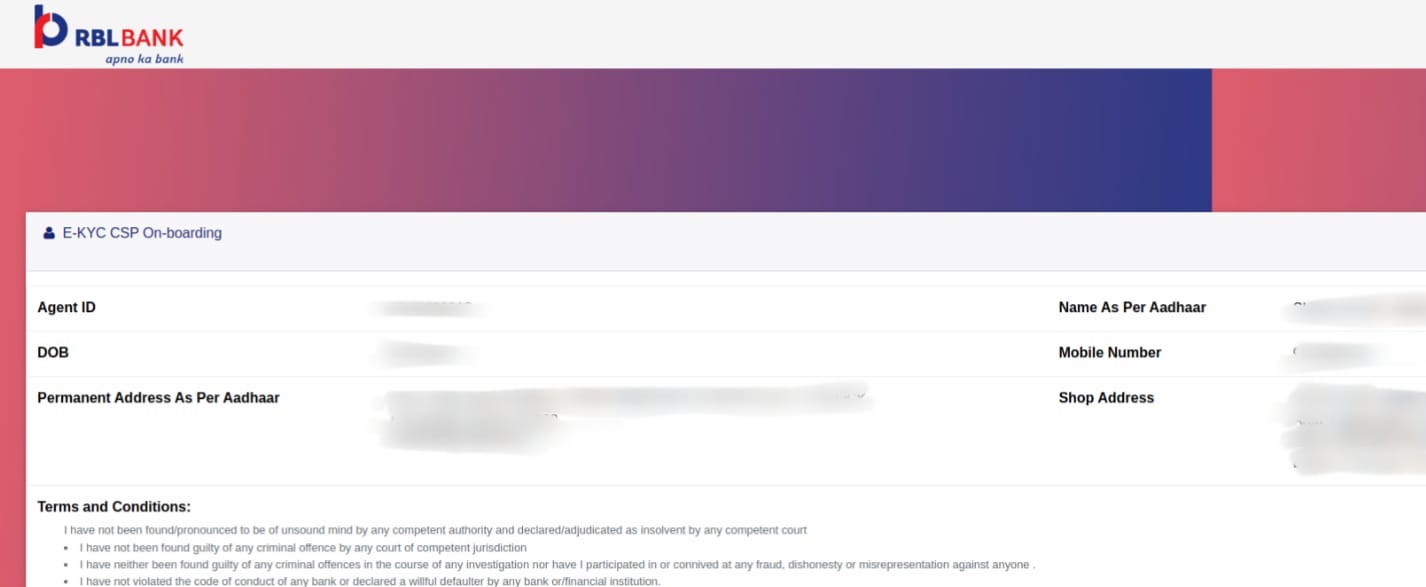
Step 6: E-KYC CSP Onboarding
- Enter Your Mobile Number
- Click on Send OTP
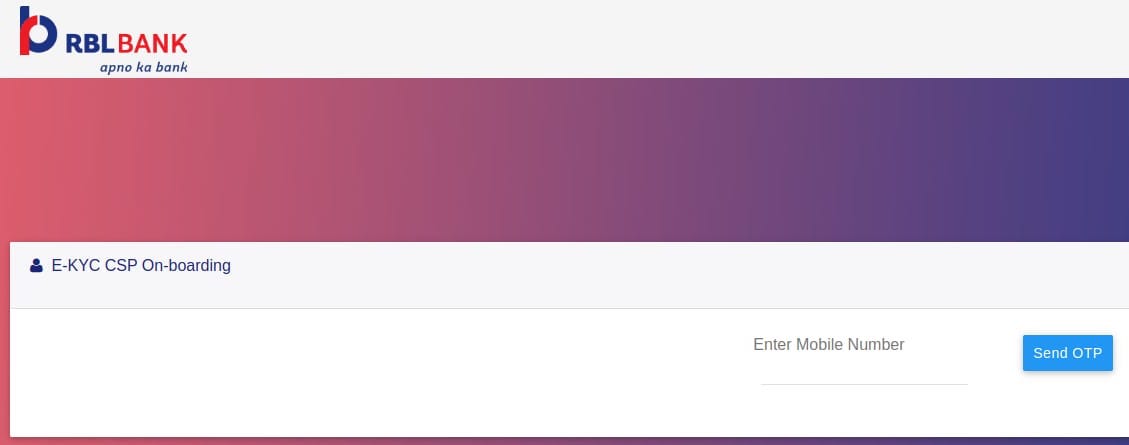
- Enter OTP & Submit
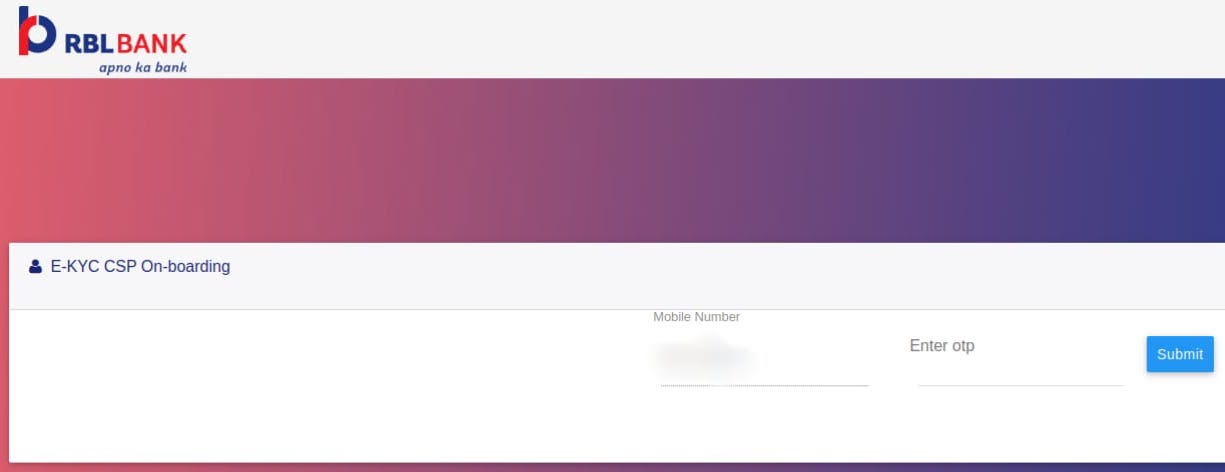
- Click on Submit button again to continue
- When you see the Thank You screen, *close this tab to return to your app on the previous screen.

Step 7: Registration Done! Proceed to Indo-Nepal Transactions
- After your KYC is comple and you are back to the following screen, click on Proceed to continue.
- Your registration has been completed, and you will be redirected to Indo-Nepal transaction screen (Search Customer)

How to Do Indo-Nepal Transfer Transactions?
Once your account is verified and active
- Log in to the portal
- Select Indo-Nepal Transfer
- In the Search Customer screen, enter sender’s mobile number.
- In the next screen, enter beneficiary details:
- Full Name
- Mobile Number
- Bank Account Number (if applicable)
- Bank Name & Branch
- Enter transaction amount
- Review all details carefully
- Confirm & Proceed
- System generates a confirmation receipt
Key Points
- Agent verification & KYC are mandatory before transactions.
- Ensure accurate beneficiary details to avoid delays/failures.
- Keep transaction receipt for records.
FAQs
What if profile update is required?
If agent details are not found during verification, system prompts Update Profile before proceeding.
How long does a transfer take?
Usually instant, but may take up to 24 hours depending on bank.
What if a transaction fails?
The amount is refunded back to the sender’s account within standard timelines.